
Quickly Set Up Linting & Pre-commit Check in React Using Eslint, Prettier & Husky
April 25th, 2022 — 6 min read — Gideon Idoko

Writing clean and quality code is important in every engineering team for clear communication among team members. We can enforce the good practice of writing clean code through linting.
“Writing clean code is what you must do in order to call yourself a professional. There is no reasonable excuse for doing anything less than your best.”
― Robert C. Martin, Clean Code: A Handbook of Agile Software Craftsmanship
Linting is the process of checking code for potential errors via a defined set of rules. It helps us save time as issues are identified before they happen. Linting is best done with the help of a linter.
In this article, you'll learn how to quickly set up linting in a react project using the linter, eslint. You'll also learn how to configure prettier to format your code and how to check your code for linting issues before any commit is made. The Airbnb style guide is used in this article.
Prerequisite
Before following up with this article, ensure:
NB: vscode is used in this article but you can use other code editors.
Bootstrapping a React App
Let's bootstrap a react app using create-react-app by running the below command
npx create-react-app app-lint-demo
You can start the react app with:
npm start
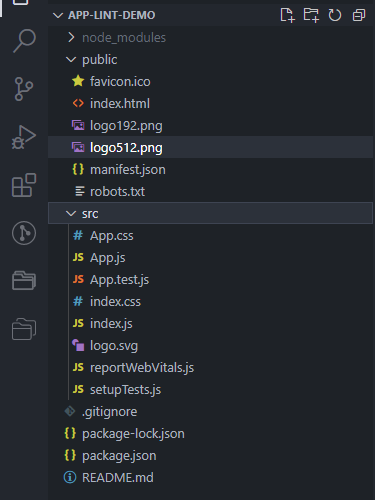
Open up the bootstrapped project in your editor. The project structure looks like the below:
Linting tools
We need the following tools to set up linting in our react project:
Main tools
eslint-- ECMAScript Lint, for parsing, identifying & reporting patterns in JavaScript codeprettier-- for code formatting
Configurations
eslint-config-airbnb-- provides airbnb's eslint configurationeslint-config-prettier-- makes sure eslint rule doesn't conflict with prettier
ESLint Plugins
eslint-plugin-import-- prevents misspelling of import names and file paths.eslint-plugin-jsx-a11y-- checks for accessibility rules on JSX elementseslint-plugin-prettier-- runs prettier as an eslint rule.eslint-plugin-react-- adds react specific linting rules to eslinteslint-plugin-react-hooks-- enforces the rules of React hooks.
Parsers
@babel/eslint-parser-- to override the default ESLint parser and provide the latest ES standard@babel/preset-react-- adds a set of plugins for babel to support react.
Installing Linting Tools
Open a terminal in the root directory of your project and run the below command to install the above tools as dev dependencies
npm install eslint prettier eslint-config-airbnb eslint-config-prettier eslint-plugin-import eslint-plugin-jsx-a11y eslint-plugin-prettier eslint-plugin-react eslint-plugin-react-hooks @babel/eslint-parser @babel/preset-react -D
Also, install the eslint and prettier extensions in the Editor you're using.
Adding Configuration Files
Create the following files in the root directory of your React project:
.eslintrc-- a JSON-like configuration file for eslint..prettierrc-- a JSON-like configuration file for prettier.eslintignore-- a file that indicates which folders or files should be omitted from linting.prettierignore-- a file that indicates which folders or files should be omitted from code formatting.
In the .eslintrc file, add the following:
{
    "env": {
        "browser": true,
        "es2021": true
    },
    "extends": [
        "plugin:react/recommended",
        "airbnb",
        "airbnb/hooks",
        "plugin:prettier/recommended"
    ],
    "parserOptions": {
        "ecmaFeatures": {
            "jsx": true
        },
        "ecmaVersion": 6,
        "sourceType": "module",
        "requireConfigFile": false,
        "babelOptions": {
            "presets": ["@babel/preset-react"]
        }
    },
    "plugins": [
        "react"
    ],
    "rules": {
        "prettier/prettier": [
            "error",
            {
              "endOfLine": "auto"
            }
        ]
    },
    "parser": "@babel/eslint-parser"
}
In the .prettierrc file, add the following:
{
    "semi": true,
    "trailingComma": "all",
    "singleQuote": true,
    "printWidth": 120,
    "tabWidth": 4,
    "tabs": true,
    "endOfLine": "auto"
}
In the .eslintignore & .prettierignore file, add the following:
node_modules/
public/
This will omit all files in the node_modules & public directories during linting checks.
NB: You can change the configurations in the config files to suit your project's needs.
Bonus (for vscode users)
Create a .vscode folder and then a settings.json file inside it. Add the following to the settings.json (vscode's user configuration) file:
{
    "eslint.workingDirectories": [
    {"mode": "auto"}
    ],
    "eslint.validate": [
        "javascript",
        "javascriptreact",
    ]
}
This will make sure that the eslint and prettier extensions you installed earlier will use your configurations to parse your code and give you feedback in real-time.
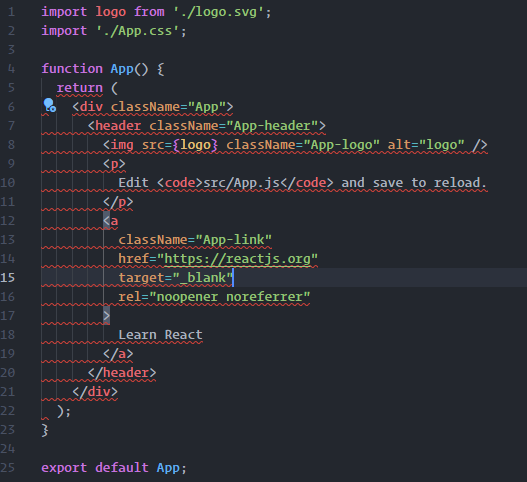
You should see that linting errors are now identified in your code with snaky underlines like in the below image:
Setup lint & fix scripts
Let's set up a lint script to help us run a link check and a lint-fix script to help us fix all auto-fixable linting issues in our code. Run the below command in the terminal (root directory of your react project).
npm set-script lint "eslint ./src/**/*.{js,jsx} --max-warnings=0"
npm set-script lint-fix "eslint ./src/**/*.{js,jsx} --fix"
Now, you can run npm run lint to run a lint check and npm run lint-fix to fix linting errors that can be automatically resolved.
Installing husky
Husky is a tool that helps to automate the process of adding git hooks -- scripts that automatically run when an event occurs in a git repo. Let's use husky to run out lint script before any change is committed to our code.
Run the below command to install husky as a dev dependency:
npm install husky -D
Now, let's set up a prepare script and run it once.
npm set-script prepare "husky install"
npm run prepare
This will install available git hooks and include a .husky folder to the root of your repository.
Let's add a pre-commit hook that will run our linting checks.
npx husky add .husky/pre-commit "npm run lint"
You'll get a response that reads, husky - created .husky/pre-commit.
Committing changes
Let's add the changes in our react project to the git staging area and try to make a commit.
git add .
git commit -m 'Setup linting'
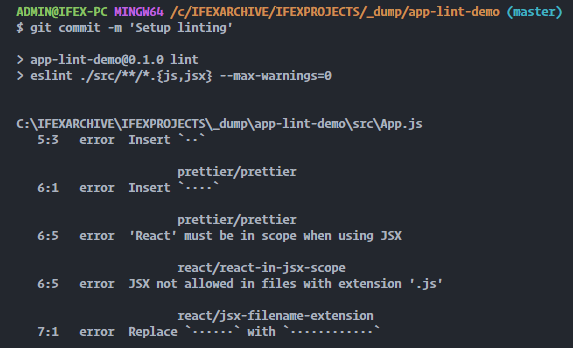
The lint script will be run before the commit is made and will fail if linting issues are found in the code, otherwise commit will be made. The script failed in the below image:
Run npm run lint-fix to fix potentially fixable errors. Manually fix the other issues if there exist.
Changes will now be committed only when the running lint script passes i.e. when there are no linting errors identified.
Stop linting issue from breaking compilation
You'll discover that linting issues break the react app. This can be fixed by creating a .env file in the root directory of your project and adding the below to it:
DISABLE_ESLINT_PLUGIN=true
ESLINT_NO_DEV_ERRORS=true
Now, your react app will no longer break when there are linting errors.
Conclusion
In this article, we looked at how to set up linting in a react project to follow the Airbnb style guide. We also learned how to automatically run a check for linting issues before changes in our projects are committed.
I hope this article will help you to write clean and quality code moving forward.
Thanks for reading😊.